Romantic Photo creates a romantic mood or setting automatically from any picture. Using exquisite lighting and design, your photos will look like they were taken using the highest professional techniques & filters. Romantic Photo - Now everyone can have a romance with photography!
Romantic Photo - Info Page iPad
Buttons
Top Bar Buttons

- Get Photo - Load a photo from your Camera Roll
- Take Photo - Take a picture
- Share - Save your image or preset, email or print your image and upload to Facebook and Twitter
- Undo - Undo the last edit
- Redo - Redo the last edit that was undone
- About - Brings you to this page.
- Products - Takes you to the iTunes App Store where you can view all our Apps.
- Crop - Cut out an area of your image hiding the rest
- Randomize - Randomizes the effect on the image.
- Original - Hold down to view the original image for a quick comparison
Heavenly Detail
- Strength - Renders a soft black and white effect to the image. Move right to increase effect strength and left to blend original color with the effect.
Dreamy Photo
- Strength - Renders a dreamy-like quality to the image. Move slider right to increase effect strength.
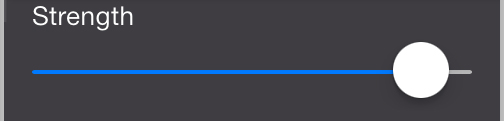
Romantic Scene

- Strength Slider - Renders a dark romantic feel to the image. Move slider right to increase effect strength.
- Softness Slider - Smooths your image giving it a more soft and romantic feel.
Morning Light
- Strength Slider - Renders a sunlit effect to your image. Move slider right to increase effect strength.
Captured Moments
- Strength Slider - Levels out shadows and light then creates mood with tone. Move slider right to increase tone strength.
Use the Color Box to select a custom color.
Warm Glow
- Strength Slider - Adds a light glow to the image then combines it with warm tones for atmosphere. Move slider right to increase tone strength. Use the color box to choose a custom color
Day Dream
- Strength Slider - Enhances softness in light areas and deepens shadows in dark ones for a day lit and dreamy feel.
Soft Touch
- Strength Slider - Combines softness and a touch of light for a soft feel.
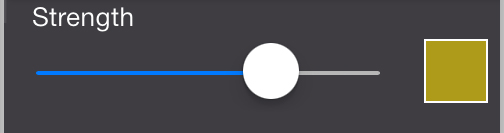
Golden Memories
- Strength Slider - Combines softness with dreamy tone for a timeless quality. Move slider right to increase tone strength. Use the Color Box to select a custom color.
Romantic Colors
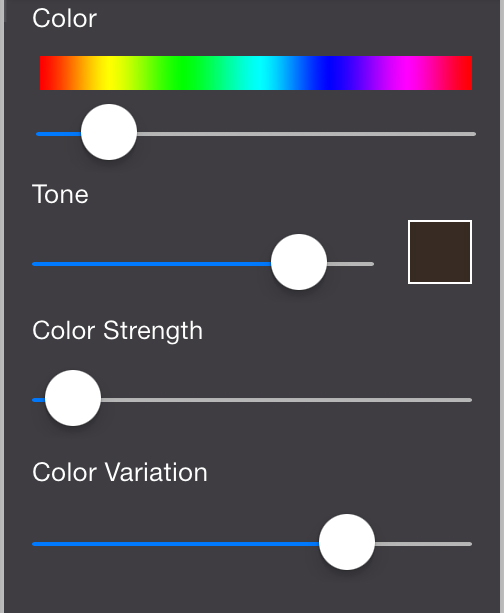
- Color Slider - Use this for selective colorization in the image. To select a color move the slider along the color picker and release. If you stopped under red then only the red areas in the image will be seen.
- Tone Slider - Overlays your image with the selected color. Use the Color Box to select a custom color.
- Color Strength - Changes the opacity of the original colors in your image. Moving the slider all the way left will remove all color in your image exept the color chosen with the Color Slider.
- Color Variation - Moving the slider right brings out more of the selected color in your photo. If you notice areas of color you do not want move the slider left to reduce these areas.
Heavenly Photo
- Strength Slider - Renders a dark dreamy black and white effect to the image. Move right to increase effect strength and left to blend original color with the effect.
Vignette Tab
- Strength Slider - Change the opacity of the Vignette around your image.
- Black and White Color Boxes - Select either black or white for the color of your images Vignette.
- Vignette Thumbnails - Select the type of Vignette to use around your image.
Saving
Click on the Share Button to open a variety of different ways to save and share your image.
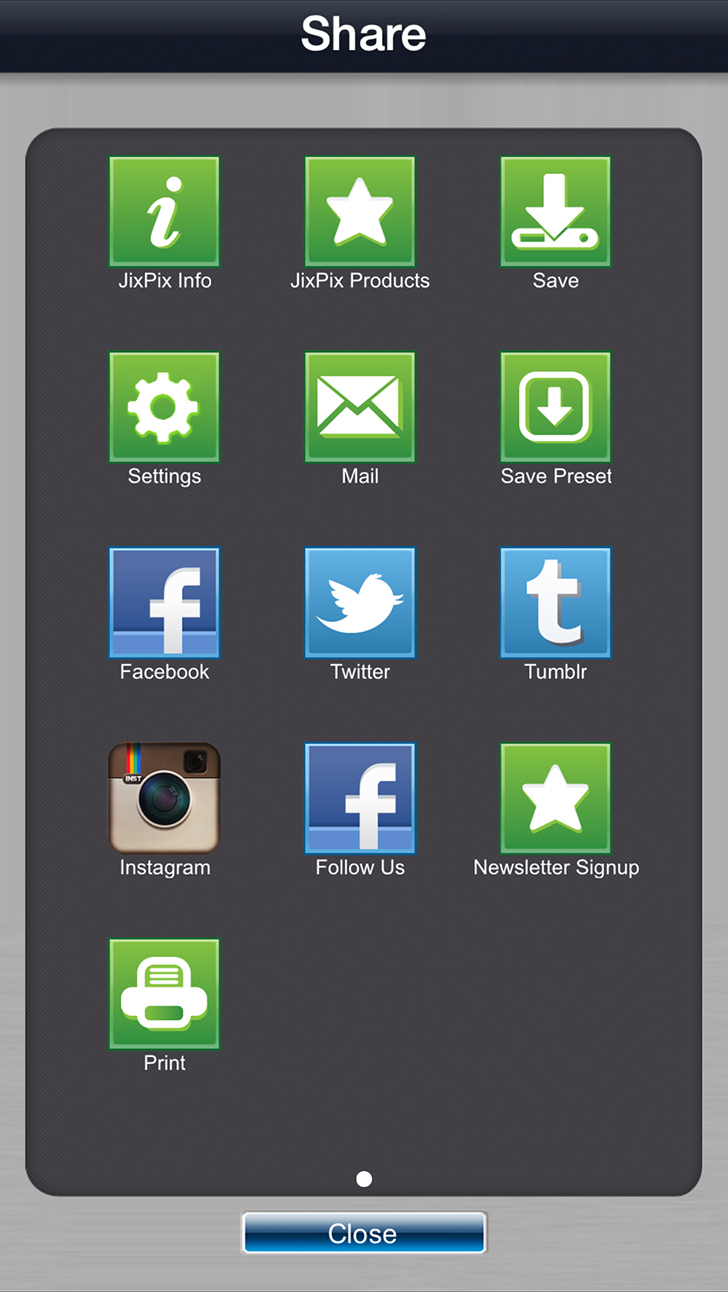
- Jixipix Info - Brings you to this page.
- Jixipix Products - Takes you to the Itunes App Store where you can view all our Apps.
- Save - Saves the image to your camera roll.
- Settings - Change Image output size, Logout of Facebook and Tumblr, and rebuild the built in presets.
- Mail - Opens up your email so you can share your photo with friends and family.
- Save Preset - Save your adjustments as a preset to use later.
- Facebook - Opens Facebook's login screen, once logged in you can share your image on facebook.
- Twitter - Opens Twitter's login screen, once logged in you can share your image on Twitter.
- Tumblr - Opens Tumblr's login screen, once logged in you can share your image on Tumblr.
- Instagram - Opens Instagram where you can upload your image. (Requires Instagram and being logged into your Instagram account.)
- Follow Us on Facebook - Opens up our Facebook page where you can like us to get info on our latest apps and updates.
- Newsletter Signup - Enter your email to be the first to here about our upcoming apps and updates.
- Print - Allows you to print using a connected printing device.
Presets
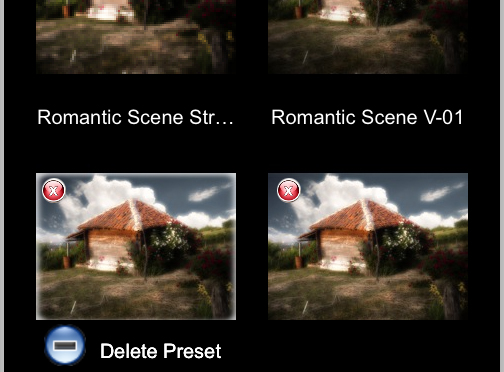
Saving and Deleting Presets
Once you have applied a preset and modified it using the adjust tabs, you can save your own custom preset by using the "Share" button on the main screen and choosing "Save Preset" off the menu. To delete a preset click the minus sign in the bottom corner which will make Xs appear next to the preset thumbnails tap them to delete.